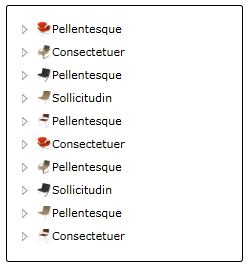
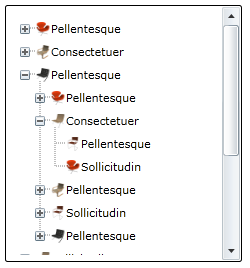
The July 2009 release of the Silverlight Toolkit has a bunch of great things in it but a few of them require just a little digging. A common request in the forums and on CodePlex is how to add connecting lines to the standard TreeView. Well, thanks to TreeViewExtensions and a pre-built template it’s now an easy request to fulfill.
I’m going to show you how to add connecting lines using Blend 3 but it’s not a requirement. Grab a copy of Expression Studio 3 if you don’t already have Blend installed. There were a lot of great enhancements with the last release so I encourage you to give it a go.
Prerequisites
- Make sure you’ve installed the July 2009 release of the Silverlight Toolkit
- Start a new Silverlight project in Blend 3
- While you could start by dragging a TreeView from the Asset pane onto the design surface I want to show off Blend’s support for sample data and editing the HierarchialDataTemplate.
Define Sample Data
One of the more annoying things when trying a do a little research into how you can tweak a control is having to come up with some kind of mock data to work with, especially when working with a TreeView because of its hierarchical nature. Blend 3 introduced a huge time-saving feature, Sample Data, that we’ll take advantage of.
For this example I want to end up with a common TreeView UI pattern, an icon followed by some text, similar to a basic file browser. With those requirements in mind lets create some sample data.
-
Switch to the Data panel
-
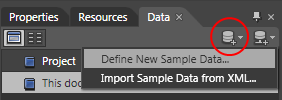
Click on the ‘Add sample data source’ icon (circled below) and choose ‘Define New Sample Data’
-
Go with all the defaults and click OK
-
Presto, magic sample data!
At this point you can drag the SampleDataSource onto the design surface and Blend will create a ListBox with fields properly bound to the control and fully interactive sample data. Very useful but we need to do a just a little more tweaking to get it where we want it.
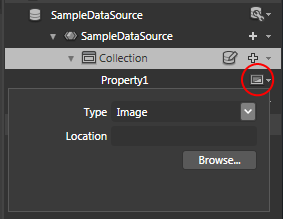
Change the property type of Property1 to an Image and Property2 to a String. You do this via the property type dialog accessed by clicking on the icon to the right of property name (circled below).
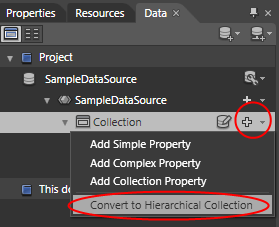
Almost there. We now have an image and some text but it’s missing that hierarchical nature. Easy enough to fix. Click on the drop down to the right of the Collection and click “Convert to Hierarchical Collection”:
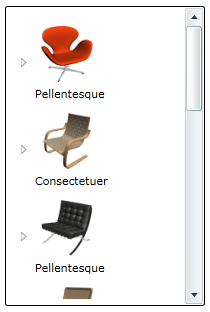
At this point you’ll have a collection that contains a collection that contains a collection that… you get my drift. Grab the first Collection underneath SampleDataSource and drag it onto the Blend design surface and watch the magic happen!
You’ll end up with something like this:
Pretty awesome considering you didn’t have to create a single mock object, mess with any XAML or write any code.
Customizing the HierarchialDataTemplate in Blend
OK, now that the rush of excitement has worn off (if it hasn’t don’t worry, just take a few deep breaths, take a walk and come back when you’ve got your heart rate under control) the harsh reality creeps in that this doesn’t look exactly like your basic file browser. Image is a bit big and the text is underneath it the icon.
Easy enough to fix:
- Select the TreeView
- There are at least three ways to navigate to the Edit Current Template menu but I find the fastest is clicking on the TreeView breadcrumb underneath the MainPage.xaml tab (illustrated below)
 ◎ image
At this point you have a very simple template to work with, a basic StackPanel containing an Image and TextBlock
Go ahead and tweak the template into something a little more like what you’d expect from a file browser:
- Change the orientation of the StackPanel to Horizontal
- Change the Width and Height of the Image to 16 x 16
- Change the VerticalAlignment of the TextBlock to Center
Now we have something much more useful:
(I changed my sample data generation on the string to only create one word with a maximum of 12 characters)
Where Are Those Connecting Lines?
I know what you’re thinking, I brought you all this way, are we ever going to get to the connecting lines part? Well, the grand revel is here!
- Add a reference to System.Windows.Controls.Toolkit (if you went with the default install it should be in C:\Program Files\Microsoft SDKs\Silverlight\v3.0\Toolkit\Jul09\Bin)
- Download TreeViewConnectingLines.xaml and add it to your project
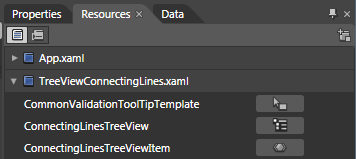
- Switch to the Resources panel and expand TreeViewConnectingLines.xaml, it’ll look like this:
 ◎ image
 - There is a style for both the TreeView itself and the TreeViewItems that it contains.
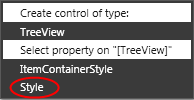
- Drag ConnectingLinesTreeView onto the TreeView and when prompted select Select property on [TreeView] Style
 ◎ image
 - Switch to the Properties panel for the TreeView
- Scroll down to ItemContainerStyle (in Miscellaneous section)
- Click the Advanced property button to the right of the property (circled below)
 ◎ image
 - Select Local Resource -> ConnectingLinesTreeViewItem
And there you go! You now have connecting lines, with a plus/plus icon showing expansion state. It even shows inside of Blend so you see exactly what you get but it’s more fun to run it and see it in all its connecting line glory!
Source
UPDATE: I’ve been asked in the comments to provide the source so without further ado get it here:
Epilogue
To be honest I could have just started with adding the connecting lines and you’d be on your way but I really wanted to show off sample data for TreeView, converting that sample data into a hierarchy and editing the HierarchicalDataTemplate in Blend 3.
